|
|
|
Who's Online
There currently are 5935 guests and
1 member online. |
|
Categories
|
|
Information
|
|
Featured Product
|
|
|
 |
|
|
There are currently no product reviews.
 ;
Speedy transaction with a quick download. Awesome hassle-free service.
;
very poolite and healpful secure transaction thanks allot
;
- Very good scan quality, PERFECT!
- Sehr gute scan Qualitaet, empfehlenswert!
Wolfgang Sundhaus
 ;
Good site, works ok and you get what you order, no problems experienced, got my manual within a day. A++++
;
Original well scanned manual. Got the job done. Microwave problem found & corrected. For $5 and a new magnitron from ebay, it was a cheap and good the first shot fix. Electrical schematics allowed me to mage sure every thing else was ok before cutting and order for parts. Hard to live without.
7. DC Balance/
Settings :
q
Mono Distortion
Adjustment
..�-� � � � 13. l&C/PB Frequency Response Adjustment Settings : � Test tape: TTA�602
q q
Test point:
TP3, TP4 (DC Balance) TP8, TP9 (Distortion)
Test point:
TP6(Lch),
TP7(Rch) IN)
q q
Adjustment
location
: L771
Input signal : 1kHz &l OkHz (LINE location:
Input level : 54dB Method
� Adjustment
SFR351 (Lch) SFR352 (Rch)
Method
: Set to FM 98.OMHZ and adjust L77 1 so that the voltage between TP3 and TP4 becomes OV + 0.04V. Next, check that the distortion is less than 1.3%
: Apply a 1kHz signal and REC mode. Then adjust OSC attenuator so that the output level at the TP6, TP7 becomes 17mV. Record and play back the lkHz and 10kHz signals and adjust SFRS so
8.
Auto Stop Level Check MW Settings : Method: Test Point: TP5 c Input level : 52dB Set to AM 1000kHz and check that the auto stop is at 52dB +lOdB FM Settings : Method:
q q q
that the output of the 10kHz signals becomes OdB + 0.5dB with respect to that of the 1kHz signal. 14. RECIPB Frequency Response Check Settings : c Test tape: TTA-615
q q
/ -15dB.
Test point : TP6(Lch), TP7(Rch) Input signal : 1kHz / 10kHz (LINE
IN)
Test Point: TP5 Input level : 25dB
Method
: Apply a lkHz signal and REC mode. Then adjust OSC attenuator so that the output level at the TP6, TP7 becomes 17mV. Record and play back the lkHz and 10kHz signals and check that the output is OdB k 2dB.
Set to FM 98.OMHZ and check that the auto stop is at 25dB ~ 10dB.
< DECK 9.
SECTION
> 15. REC/PB Sensitivity
q q
Adjustment TP7(Rch)
Tape Speed Adjustment Settings :
q q q
(DECK
1, DECK 2)
Settings :
Test tape : TTA�1OO Test point: Adjustment TP6(Lch), TP7(Rch) location : SFR1 Method
Test tape: TTA�602 Test point : TP6(Lch),
� Input signal : 1kHz (LINE IN) q Adjustment location : SFR305 (Lch) SFR306 (Rch) : Apply a lkHz signal and REC mode, Then adjust OSC attenuator so that the output level at the TP6, TP7 becomes 170mV. Record and play back the lkHz signals and adjust SFRS so that the output of signals becomes O + 0.5dB.
Method:
Play back the test tape and adjust SFR1 so that the frequency counter reads 3000Hz f 5Hz. Adjustment (DECK 1, DECK 2)
10, Head Azimuth Settings :
q q q
Test tape: TTA-300 Test point: Adjustment TP6(Lch), location: TP7(Rch) Head azimuth adjustment screw
the lkHz
16, REC/PB Sensitivity
Settings :
q q q
Method:
Play back (FWD) the 10kHz signal of the test tape and adjust screw so that the output becomes maximum. Next, perform on REV PLAY mode. 1, DECK 2)
Check Test tape: TTA-615 Test point: TP6(Lch), TP7(Rch) Input signal :1 kHz (LINE IN)
Method:
Apply a lkHz signal and REC mode. Then adjust OSC attenuator so that the output level at the TP6, TP7 becomes 170mV. Record and play back the lkHz signals and check that the output is O A 1.5dB.
11. PB Frequency Response Check (DECK Settings : Method:
q q
Test tape: TTA�300 Test point :TP6(Lch),
TP7(Rch)
Play back the 315Hz and 10kHz signals of the test tape and check that the output ratio of the 10kHz signal with respect to that of the 315Hz signal is within 2dB.
12. PB Sensitivity
Adjustment
(DECK
1, DECK 2) TP7(Rch) SFR301 (DECKl,Lch) SFR302 (DECKl,Rch) SFR303 (DECK2,Lch) SFR304 (DECK2,Rch)
Settings : � Test tape: TTA-200 q Test point : TP6(Lch),
q
Adjustment
Location:
Method:
Play back the test tape and adjust SFRS so that the output level at TP6,TP7 becomes 245mVt 10mV.
41
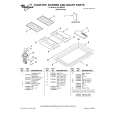
 $4.99 NSXA959 AIWA
Owner's Manual Complete owner's manual in digital format. The manual will be available for download as PDF file aft…
|
|
|
> |
|