|
|
|
Who's Online
There currently are 5899 guests online. |
|
Categories
|
|
Information
|
|
Featured Product
|
|
|
 |
|
|
There are currently no product reviews.
 ;
Really good and well scanned. File is complete the full service manual for 5$
 ;
Good product and very helpfull to repair. Many thanks.
 ;
Very good product. Best service manual. Many thanks
 ;
I am only search for 5 Minute, by it in 5 Minutes to and get ist in few ours! Best i found in the Internet and my Amplifer is repaired as well! Thank you
 ;
Readable text and good copy. Very much needed if you wish to do some repairs on this fine old unit.
@ Press the �DISP button to show �**W &&� on the display. (hexadecimrd display) Check that value of the display is within the range shown below. F** ................................ 20-40 T## ................................ 15-35 s&& .............................. 15-35 @ When the adjustment is completed, press the s button to display �ALL SV OFF�. Adjusting PIT disc 1) Insert the test disc TGYS-1. 2) Press the s button to display �ALL SV OFF�. 3) When the �TITLW button is pressed, �AUTO ADJ� is displayed. When the adjustment is completed, �DONJ? is displayed. (When �FAILED appears, it means that adjustment has failed.) 4) When the adjustment is completed, press the 9 button to display �ALL SV OFF�. How to check IVR, EFB, and focusltrackinglsled gain. Perform the same operations as the MO disc check, using the PIT disc. The data on the display must be within the following range. IVR ............................... 14-19 EFB ............................... 09-12 F** ................................ 2A-45 T## ................................ 20-40 S&& .............................. 20-40 4-2-4. Error Rate Check (PIT disc) 1) Insert the test disc TGYS-1. 2) Move the optical pick up to the center with W button and Wl button. 3) Press the �MODE button to display �SELECT PIT�. 4) Press MD ®11button to display �FOCUS ON!�. 5) Press the �ENTER� button to display �ALL SV ON, and press the �DISP button to display �ErOO**0000. 6) Check the underlined vrdue of ErOO~-0000 is �30 or less. 7) When the adjustment is completed, press the s button to display �ALL SV OFF�.
4-2-5. Record/Playback Error Rate Check (MO disc)
Insert the test disc MDW-60. Move the opticat pickup to the center with M button and M button. Press the �MODE button to display �SELECT GRV�. Press the �MD REC� button to display �REC Analog�. When �REC Digital� is displayed, press the s button then press the CD Ml button to change the setting, and perform step 3) and higher again. 5) Press the MD ®11 button to display �FOCUS ON!�. 6) Press the �CD 4 MD� button after pressing the �ENTER button to display �ALL SV ON�. 7) When the �MD REC� is repressed, the OWH moves. The recording starts from the 600 cluster. Then the display changes from �ALL SV ON to �ADR~ ##�. The value 00 with underline of �ADR~ ##� means the 600 cluster 8) After recording of about 15 seconds, press s button to display �ALL SV OFF�. Press the �MD eject� button again to move up the OWH. 9) Press the MD ®11button to playback the recorded segment. 10) Press the �ENTER� to dispiay-��ALL SV ON, and ~ress the �DISP button to display �OO** 0000�. Check that the underlined vrdue of the display 00~ 0000 is �20 or less when cluster is 600 or higher. 11) After adjustment is completed, press the s button to display �ALL SV OFF�. 4-2-6. UTOC ERASE Perform the following procedure only when the recorded disc needs to be erased. 1) Insert a disc from which UTOC is going to be erased. 2) Move the optical pick up to the center with M button and PM button. 3) Press the �MODE� button to display �SELECT GRV�. 4) Press the �REC� button to display �REC Anrdog�. 5) Press MD ®l button to display �FOCUS ON!�. 6) Press the �CD ~ MD� button after pressing the �ENTER button to display �ALL SV ON, 7) When the �ERASE button is pressed, �UTOC ERASE appeam on the display and UTOC is erased. After erasure is completed, �ALL SV OFF� appeam on the display. 8) Press the �MD eject� button two times to eject the disc.
1) 2) 3) 4)
46
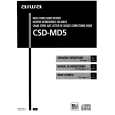
 $4.99 CSDMD5 AIWA
Owner's Manual Complete owner's manual in digital format. The manual will be available for download as PDF file aft…
|
|
 |
> |
|
