|
|
|
Who's Online
There currently are 5744 guests online. |
|
Categories
|
|
Information
|
|
Featured Product
|
|
|
 |
|
|
There are currently no product reviews.
 ;
This GRUNDIG UV5A Owner Manual is not only an instruction manual but a total functional circuit description of the Multimeter and includes circuit diagram at the end pages. It is very helpful for repairing and calibrating the instrument. It is written in two languages English and German for international support. It was very easy to repair my unit with this document. Regards, Regis Pauly, Electrical Engineer.
;
The owner's manual was evetything I thought it would be. I was able to print it out using both sides of the paper in quick order, saving me a search online for a used one.
 ;
Хорошее качество сканирования.
Мануал пришел часов эдак через 12. В целом доволен.
;
Fantastic quality and impressive delivery time. Based on this manual, I recommend this service without hesitation! Five Stars for certain.
;
Was happy to find the complete owners manual... It's all in there, just like the original...
Adjusting sound
You can select the following modes for adjusting sound depending on the music you listen to: BASS (low frequencies), TRE (high frequencies), BAL (left/right), FAD (front/ rear) and H-BASS (high bass).
Setting the clock
1 Press and hold DSPL until the clock indicator
flashes in the display. 2 Press + (to set hour) or � (to set minute), and then turn Jog dial. 3 Press DSPL.
1 Press SEL repeatedly to select the mode to be
adjusted. Pressing SEL cycles through the modes. The selected mode�s indicator appears. 2 Turn Jog dial to increase/decrease the level or to select on/off for the selected mode.
Displaying the clock
1 Press DSPL. To return to the former display, press DSPL again.
Note
Adjust the level or select on/off within 5 seconds, or the selected mode will return to previous state.
RADIO OPERATION
Tuning in to a station
(Seek/Manual Tuning)
LO
Aligning the source levels
(Source Level Adjuster)
Volume may vary each time you change the source mode. In this case, you can align each source mode�s volume to almost the same level. 1 Press Jog dial (PUSH-SOURCE) or TU (TUNER) repeatedly to select the desired mode. 2 Press DSPL while pressing SEL. �LA 0� appears on the display. 3 Turn Jog dial to adjust the level.
+/�
TU (TUNER) Local indicator Stereo indicator
Note
Adjust the level within 5 seconds, or the selected mode will be canceled.
Restoring the factory settings
1 Turn off the unit. 2 Press and hold DSPL until �LA --� appears on the
display. Band indicator Frequency indication TUNER indication
1 Press TU (TUNER) repeatedly to select the desired
band (FM1, FM2, FM3, AM1, or AM2).
Note
You can restore the factory settings only for VOL, BASS, TRE, BAL, FAD, and H-BASS, and aligned source volume levels.
2* Press + (to move to higher frequencies) or � (to
move to lower frequencies) to tune in to a station. �STEREO� appears on the display when an FM station is broadcasting in stereo, and receiving conditions are good. *Seek Tuning and Manual Tuning � Press and hold + or � until seek Tuning starts. The unit locates a station automatically (Seek Tuning). � Press + or � repeatedly to search for a desired station while increasing or decreasing the frequency step by step (Manual Tuning). To stop Seek Tuning, press + or � again.
Setting the beep tone
1 Turn off the unit. 2 Press and hold SEL until �bEEP� appears on the
display.
3 Turn Jog dial to select on (level indicators appear)
or off (level indicators disappear).
4 Press SEL.
3
ENGLISH
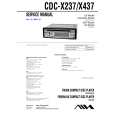 $4.99 CDCX437 AIWA
Service Manual Complete service manual in digital format (PDF File). Service manuals usually contains circuit diagr…
|
|
|
> |
|